こんにちはコーヤです。
このページでは、SwiftUIのボタンの使用方法についてご紹介します。
以下のバージョンで動作確認しています。
- Xcode 13.4.1
- Swift 5.6.1
ボタンのコード
ボタンの書式は主に3種類あります。ボタンとしての効果はどれも同じです。
書式1
Button(ボタン名){
    アクション
}
書式2
Button(action: {
    アクション
}) {
    Text(ボタン名)
}
書式3
Button(action: {
    アクション
}, label: {
    Text(ボタン名)
})
どの書式でも同じボタンになるので、自分が読みやすいコードになるように選びましょう。
ボタンの具体例
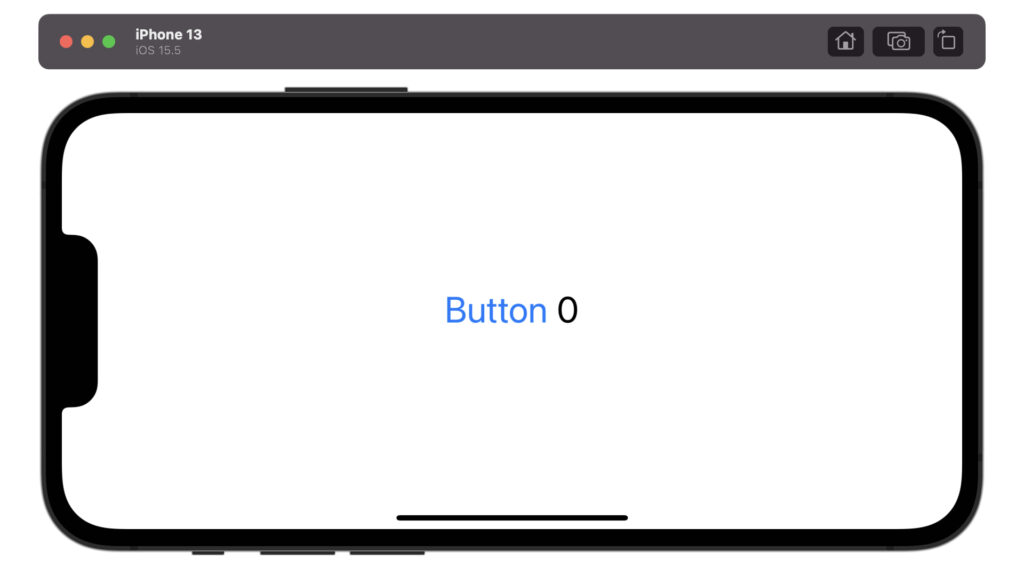
上記の3種類の書式それぞれのコードです。
最初は0が表示されており、Buttonの部分を押すと1から6までランダムな数字が表示されるボタンです。
書式1
struct ContentView: View {
    @State var num: Int = 0
    var body: some View {
        HStack {
            Button("Button"){
                num = Int.random(in: 1...6)
            }
            Text("\(num)")
        }
        .font(.largeTitle)
    }
}
書式2
struct ContentView: View {
    @State var num: Int = 0
    var body: some View {
        HStack {
            Button(action: {
                num = Int.random(in: 1...6)
            }) {
                Text("Button")
            }
            Text("\(num)")
        }
        .font(.largeTitle)
    }
}
書式3
struct ContentView: View {
    @State var num: Int = 0
    var body: some View {
        HStack {
            Button(action: {
                num = Int.random(in: 1...6)
            }, label: {
                Text("Button")
            })
            Text("\(num)")
        }
        .font(.largeTitle)
    }
}
アクションが複雑な場合の対処方法
ボタンを押したときのアクションが複雑になった場合、ボタンのコードの中にアクションを書くと読みにくくなります。
そこで、アクションの中身を関数だけにしてコードをスッキリさせることができます。
同様にラベルが複雑になった場合でも、ラベルはビュー名だけにすることができます。
以下のコードは上記の1から6までランダムに表示するボタンを関数とビューを使用して書いたものです。
struct ContentView: View {
    @State var num: Int = 0
    var body: some View {
        HStack {
            Button(action: {
                num = dice()
            }, label: {
                ButtonView()
            })
            Text("\(num)")
        }
        .font(.largeTitle)
    }
}

func dice() -> Int {
    var result: Int = 0
    result = Int.random(in: 1...6)
    return result
}

struct ButtonView: View {
    var body: some View {
        Text("Button")
    }
}
ボタンの書式設定
.buttonStyle(ボタンの書式)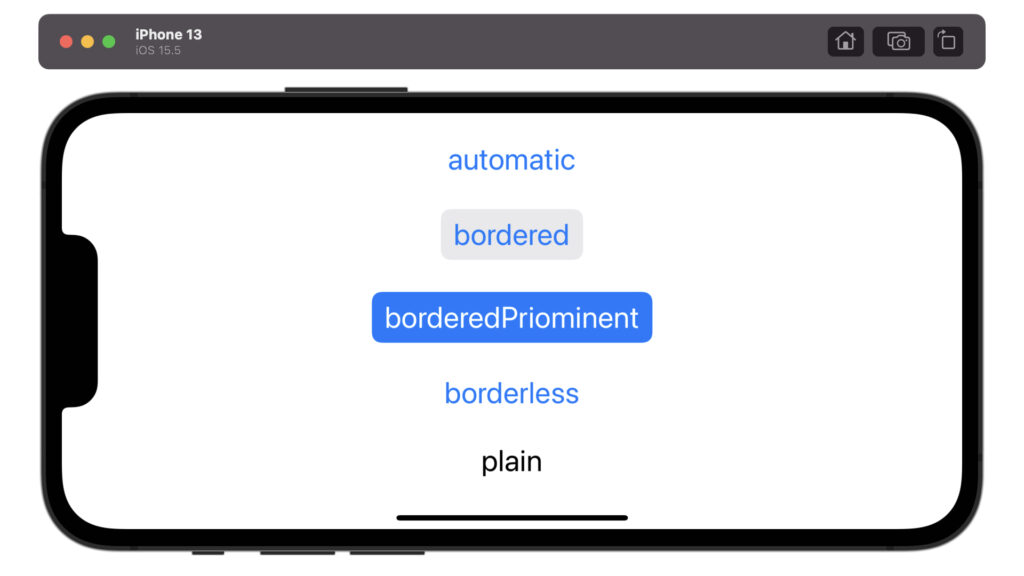
struct ContentView: View {
var body: some View {
VStack(spacing: 30) {
Button("automatic"){}
.buttonStyle(.automatic)
Button("bordered"){}
.buttonStyle(.bordered)
Button("borderedPriominent"){}
.buttonStyle(.borderedProminent)
Button("borderless"){}
.buttonStyle(.borderless)
Button("plain"){}
.buttonStyle(.plain)
}
.font(.title)
}
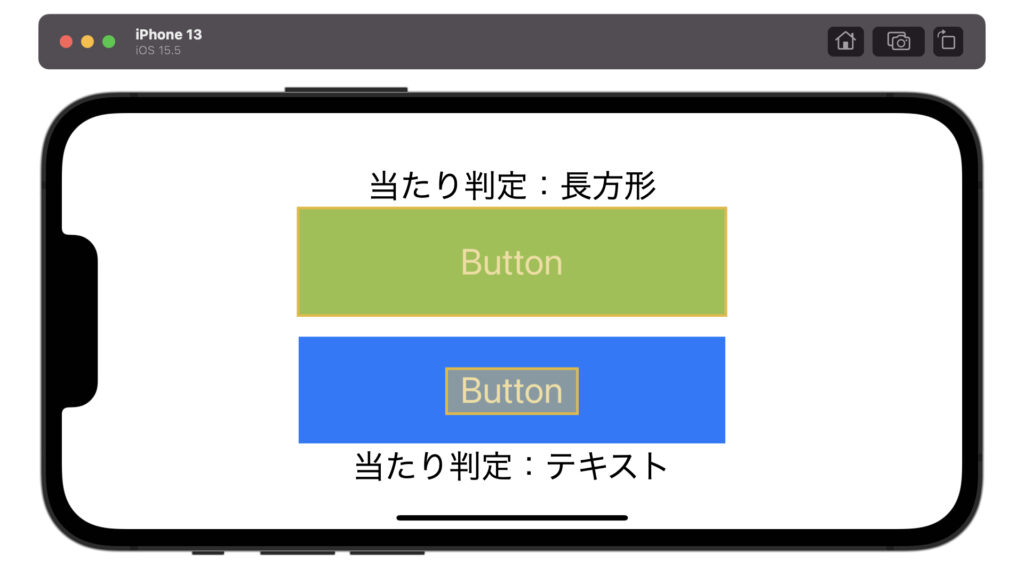
}ボタンの当たり判定
ボタンには当たり判定があります。テキストつきの長方形ボタンを書くとき、以下の2パターンでそれぞれ当たり判定が異なります。
struct ContentView: View {
var body: some View {
VStack(spacing: 50) {
Button(action: {}, label: {
Rectangle()
.frame(width: 400, height: 100)
.foregroundColor(.green)
.overlay(
Text("Button")
.foregroundColor(.white)
)
})
Button(action: {}, label: {
Text("Button")
.foregroundColor(.white)
.background(
Rectangle()
.frame(width: 400, height: 100)
.foregroundColor(.blue)
)
})
}
.font(.largeTitle)
}
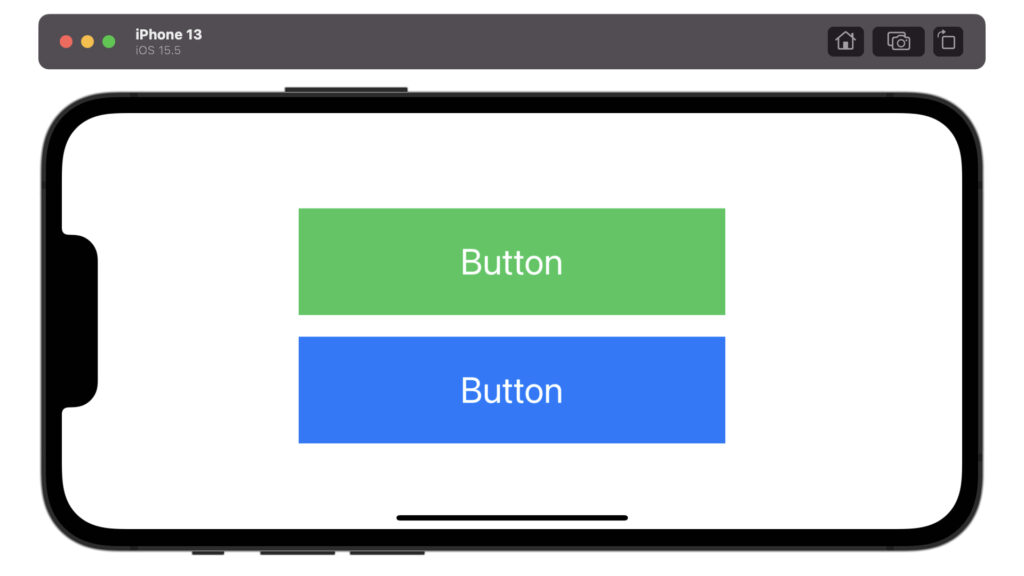
}緑色のボタンは長方形の上にテキストを書いています。青色のボタンはテキストの背景に長方形があります。
この場合、緑色のボタンの当たり判定は長方形全体になり、青色のボタンの当たり判定はテキストの部分だけになります。
おそらく緑色のボタンの方が適切な当たり判定だと思います。ボタンを設置する際は気をつけましょう。
以上です。ご参考になれば幸いです。
コメント欄