こんにちはコーヤです。
このページでは、SwiftUIで画像を表示する方法をご紹介します。
以下のバージョンで動作確認しています。
- Xcode 13.4.1
- Swift 5.6.1
画像の取り込み方法
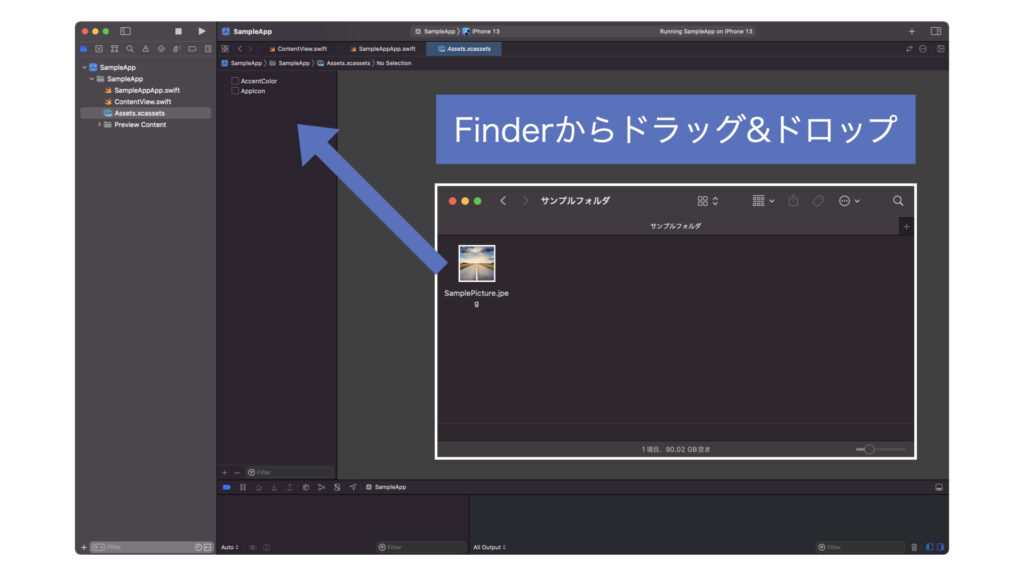
ファインダーからXcodeにドラック&ドロップで画像を取り込むことができます。
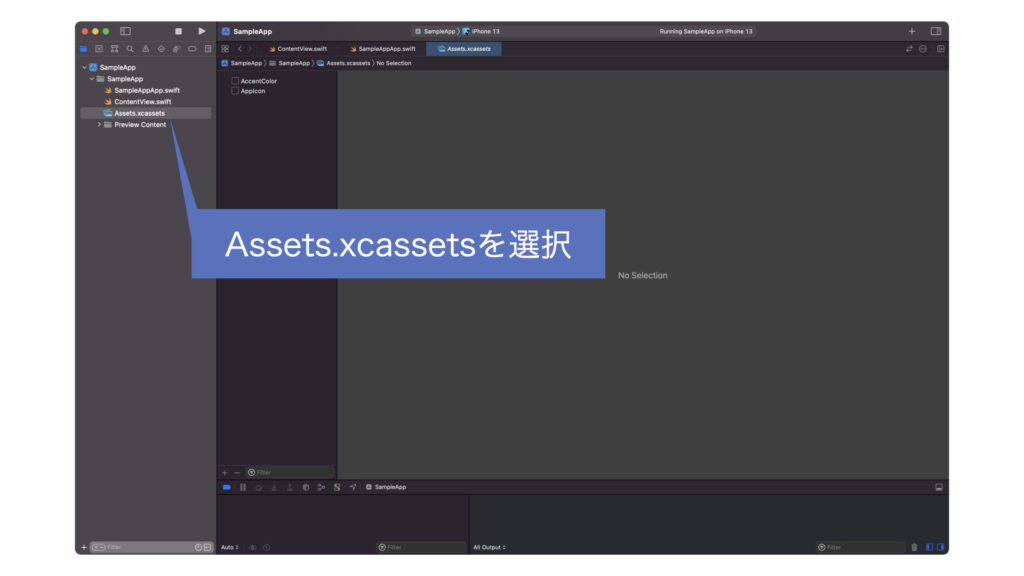
XcodeはAssets.xcassetsを開いておきましょう。Xcode左側のナビゲーターエリアから選択します。
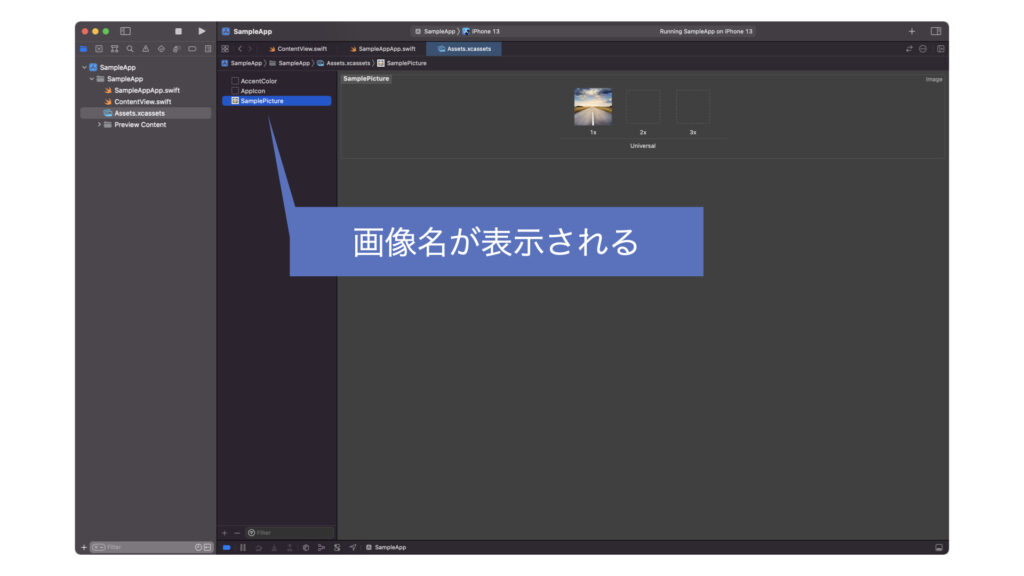
Assets.xcassetsに画像名が表示されたら、ソースコードの中でその画像名が使えるようになります。
Image("画像名")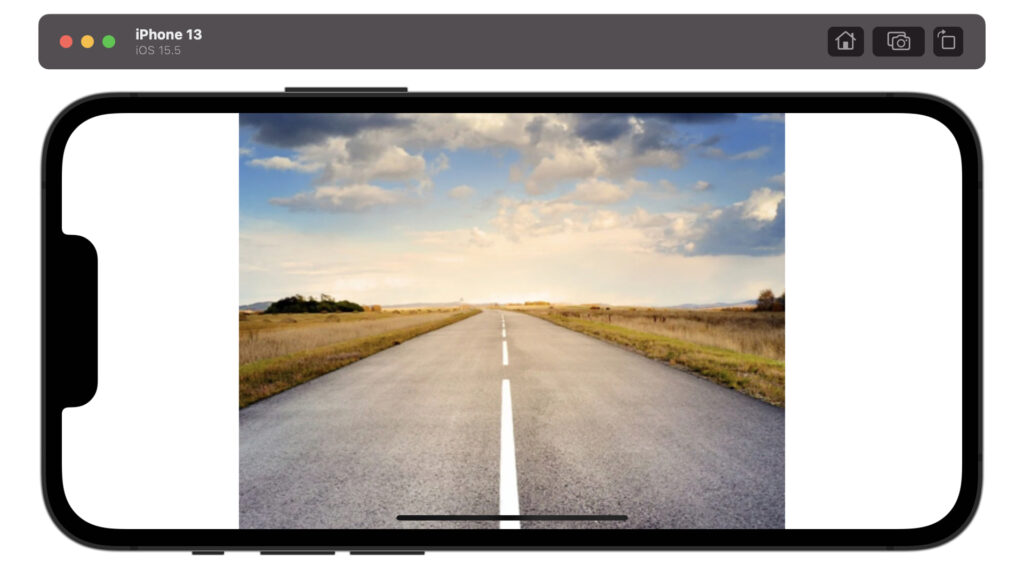
struct ContentView: View {
    var body: some View {
        Image("SamplePicture")
    }
}
画像サイズの設定方法
縦横比を変動させる
.resizable()
.frame(width: 横の長さ, height: 縦の長さ)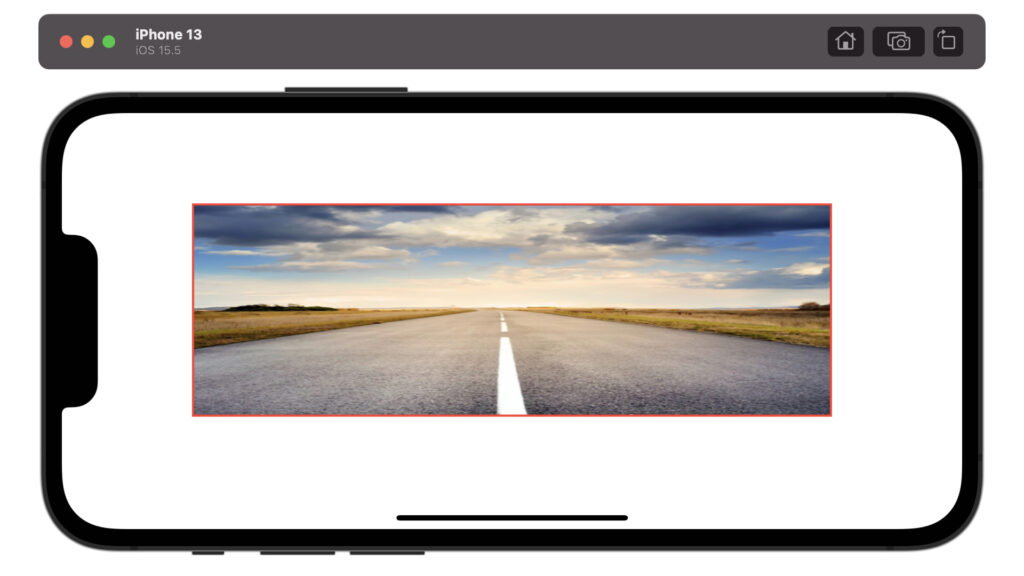
struct ContentView: View {
    var body: some View {
        Image("SamplePicture")
            .resizable()
            .frame(width: 600, height: 200)
            .border(Color.red, width: 2)
    }
}
縦横比を固定する(短辺基準)
.resizable()
.scaledToFit()
.frame(width: 横の長さ, height: 縦の長さ)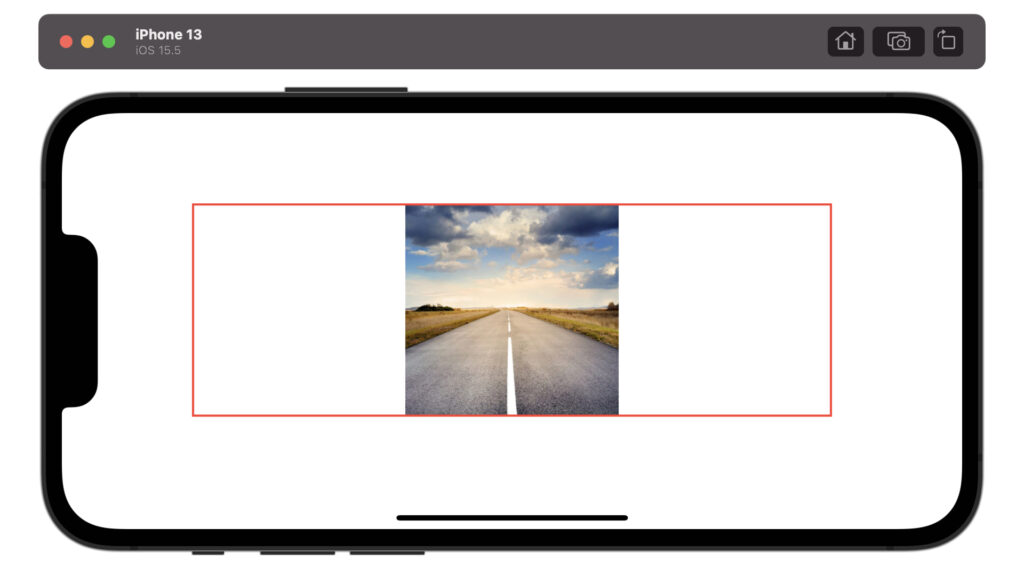
struct ContentView: View {
    var body: some View {
        Image("SamplePicture")
            .resizable()
            .scaledToFit()
            .frame(width: 600, height: 200)
            .border(Color.red, width: 2)
    }
}
縦横比を固定する(長辺基準)
.resizable()
.scaledToFill()
.frame(width: 横の長さ, height: 縦の長さ)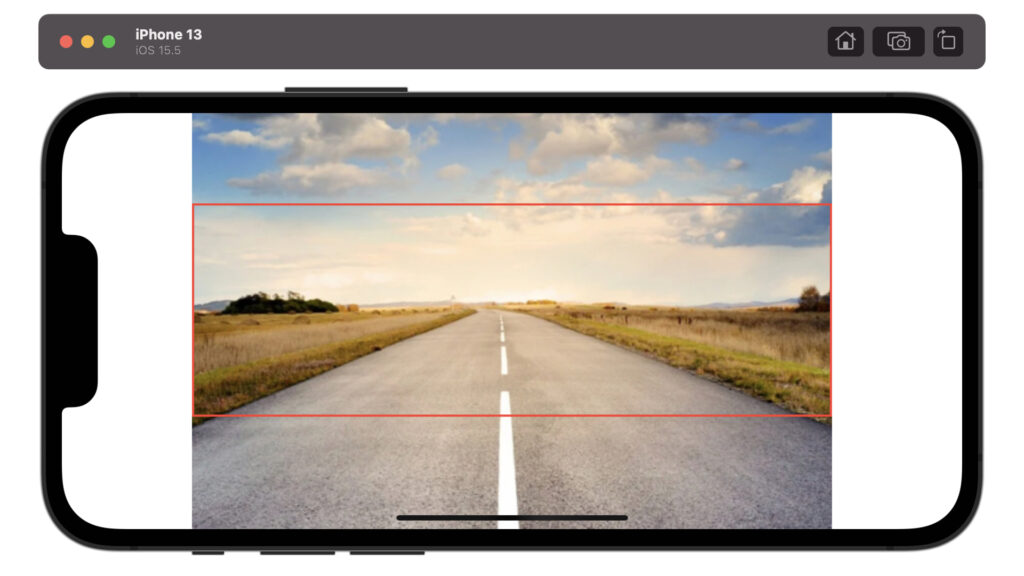
struct ContentView: View {
    var body: some View {
        Image("SamplePicture")
            .resizable()
            .scaledToFill()
            .frame(width: 600, height: 200)
            .border(Color.red, width: 2)
    }
}
背景画像の設定方法
縦横比を変動させる
.resizable(resizingMode: .stretch)
.ignoresSafeArea()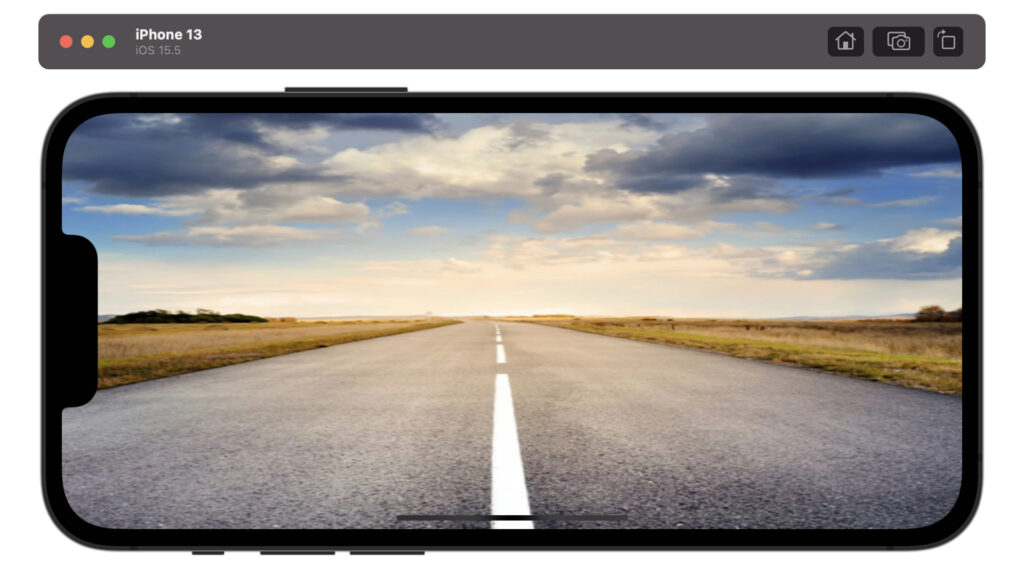
struct ContentView: View {
    var body: some View {
        Image("SamplePicture")
            .resizable(resizingMode: .stretch)
            .ignoresSafeArea()
    }
}
縦横比を固定する
.resizable(resizingMode: .tile)
.ignoresSafeArea()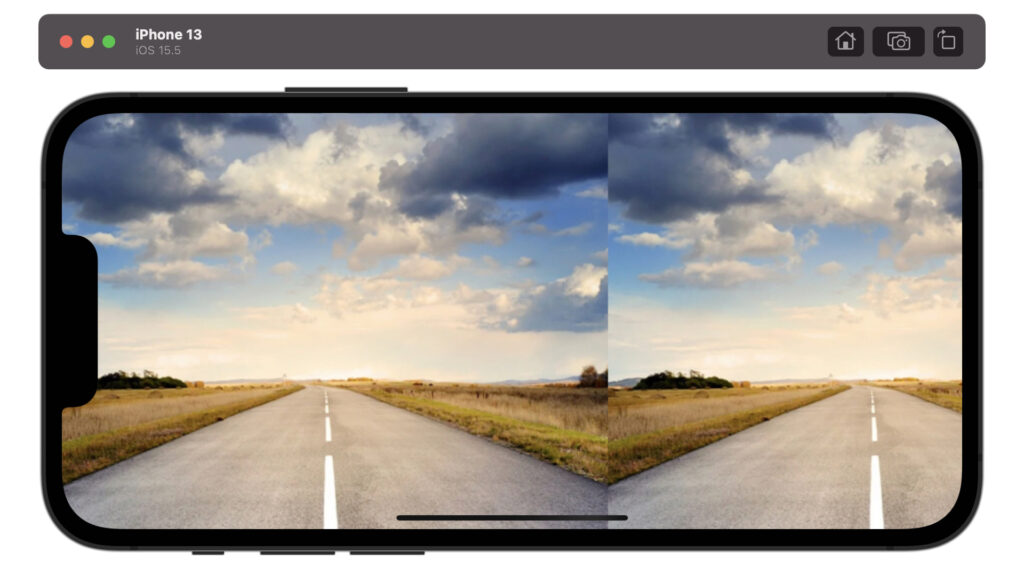
struct ContentView: View {
    var body: some View {
        Image("SamplePicture")
            .resizable(resizingMode: .tile)
            .ignoresSafeArea()
    }
}
以上です。ご参考になれば幸いです。
コメント欄