こんにちはコーヤです。
このページでは、SwiftUIで画像を編集する方法をご紹介します。
以下のバージョンで動作確認しています。
- Xcode 13.4.1
- Swift 5.6.1
切り取りの設定方法
フレームからはみ出た部分を切り取る
.clipped()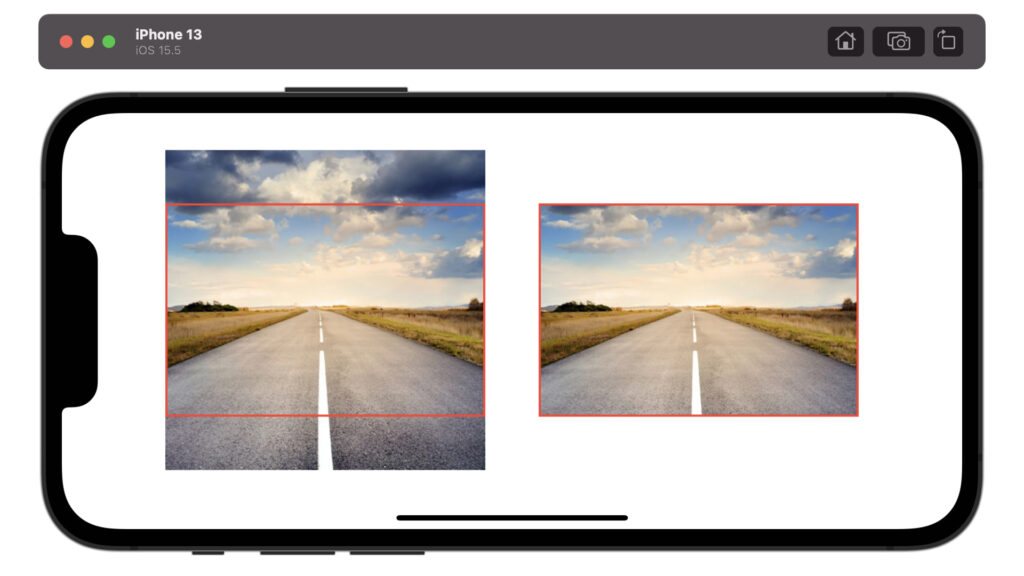
struct ContentView: View {
    var body: some View {
        HStack {
            Spacer()
            Image("SamplePicture")
                .resizable()
                .scaledToFill()
                .frame(width: 300, height: 200)
                .border(Color.red, width: 2)
            Spacer()
            Image("SamplePicture")
                .resizable()
                .scaledToFill()
                .frame(width: 300, height: 200)
                .border(Color.red, width: 2)
                .clipped()
            Spacer()
        }
    }
}
図形の形に切り取る
.clipShape(図形)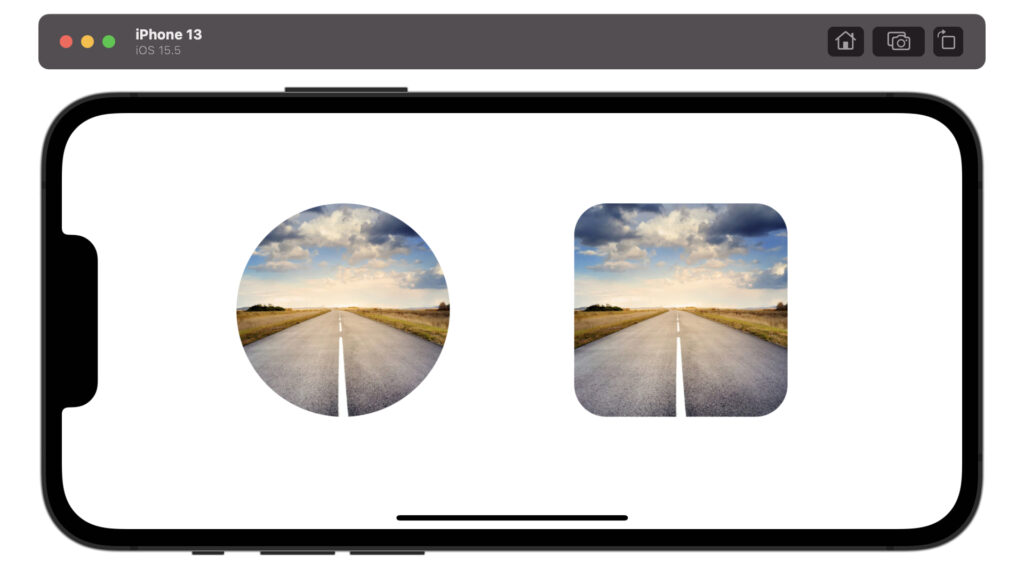
struct ContentView: View {
    var body: some View {
        HStack {
            Spacer()
            Image("SamplePicture")
                .resizable()
                .scaledToFill()
                .frame(width: 200, height: 200)
                .clipShape(Circle())
            Spacer()
            Image("SamplePicture")
                .resizable()
                .scaledToFill()
                .frame(width: 200, height: 200)
                .clipShape(RoundedRectangle(cornerRadius: 30))
            Spacer()
        }
    }
}
倍率の設定方法
.scaleEffect(表示倍率)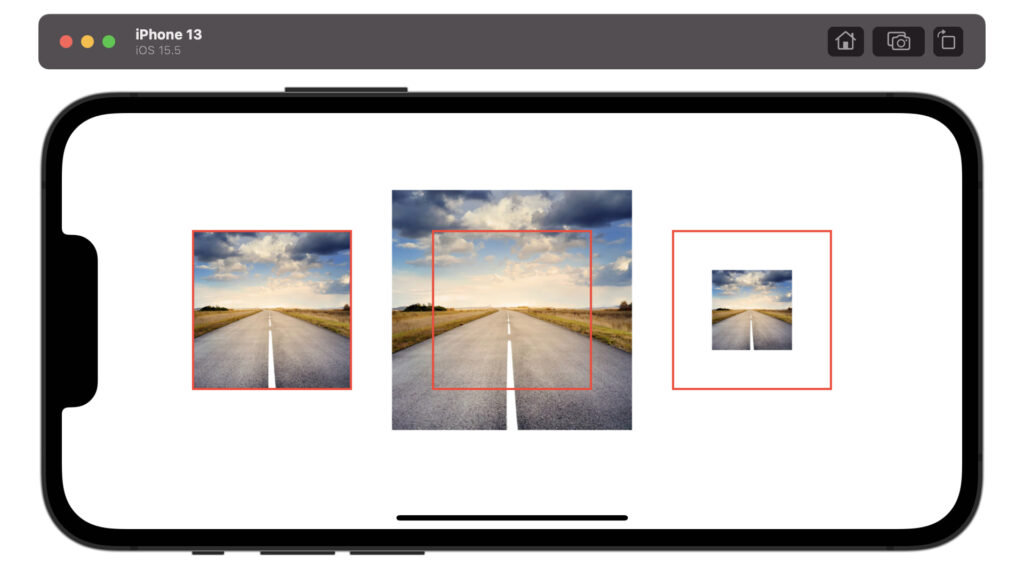
struct ContentView: View {
    var body: some View {
        HStack {
            Spacer()
            Image("SamplePicture")
                .resizable()
                .scaledToFit()
                .frame(width: 150, height: 150)
                .border(Color.red, width: 2)
            Spacer()
            Image("SamplePicture")
                .resizable()
                .scaledToFit()
                .scaleEffect(1.5)
                .frame(width: 150, height: 150)
                .border(Color.red, width: 2)
            Spacer()
            Image("SamplePicture")
                .resizable()
                .scaledToFit()
                .scaleEffect(0.5)
                .frame(width: 150, height: 150)
                .border(Color.red, width: 2)
            Spacer()
        }
    }
}
位置の設定方法
.offset(x: 横方向のズレ, y: 縦方向のズレ)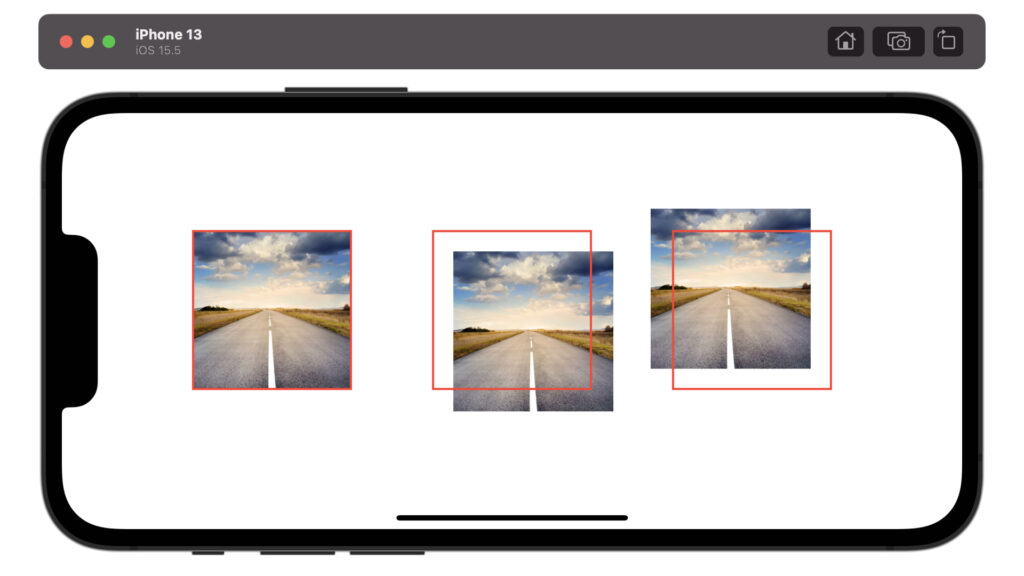
struct ContentView: View {
    var body: some View {
        HStack {
            Spacer()
            Image("SamplePicture")
                .resizable()
                .scaledToFit()
                .frame(width: 150, height: 150)
                .border(Color.red, width: 2)
            Spacer()
            Image("SamplePicture")
                .resizable()
                .scaledToFit()
                .offset(x: 20, y: 20)
                .frame(width: 150, height: 150)
                .border(Color.red, width: 2)
            Spacer()
            Image("SamplePicture")
                .resizable()
                .scaledToFit()
                .offset(x: -20, y: -20)
                .frame(width: 150, height: 150)
                .border(Color.red, width: 2)
            Spacer()
        }
    }
}
文字の設定方法
.overlay(
    Text("文字")
)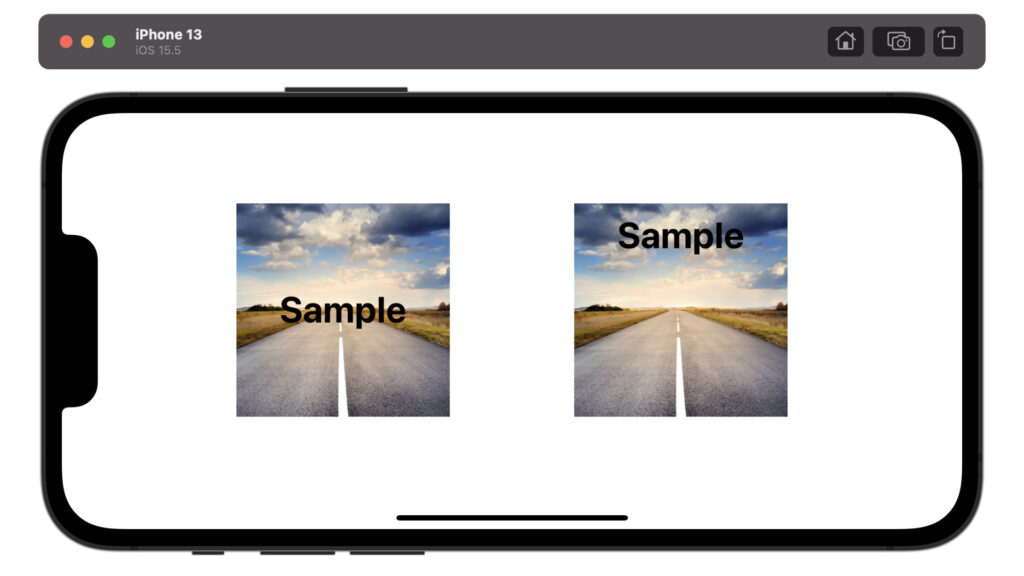
struct ContentView: View {
    var body: some View {
        HStack {
            Spacer()
            Image("SamplePicture")
                .resizable()
                .scaledToFit()
                .frame(width: 200, height: 200)
                .overlay(
                    Text("Sample")
                        .font(.largeTitle)
                        .fontWeight(.bold)
                        .foregroundColor(.black)
                )
            Spacer()
            Image("SamplePicture")
                .resizable()
                .scaledToFit()
                .frame(width: 200, height: 200)
                .overlay(
                    Text("Sample")
                        .font(.largeTitle)
                        .fontWeight(.bold)
                        .foregroundColor(.black)
                        .offset(x: 0, y: -70)
                )
            Spacer()
        }
    }
}
影の設定方法
.shadow(color: 影の色, radius: 影の広がり具合, x: 影の横方向のズレ, y: 影の縦方向のズレ)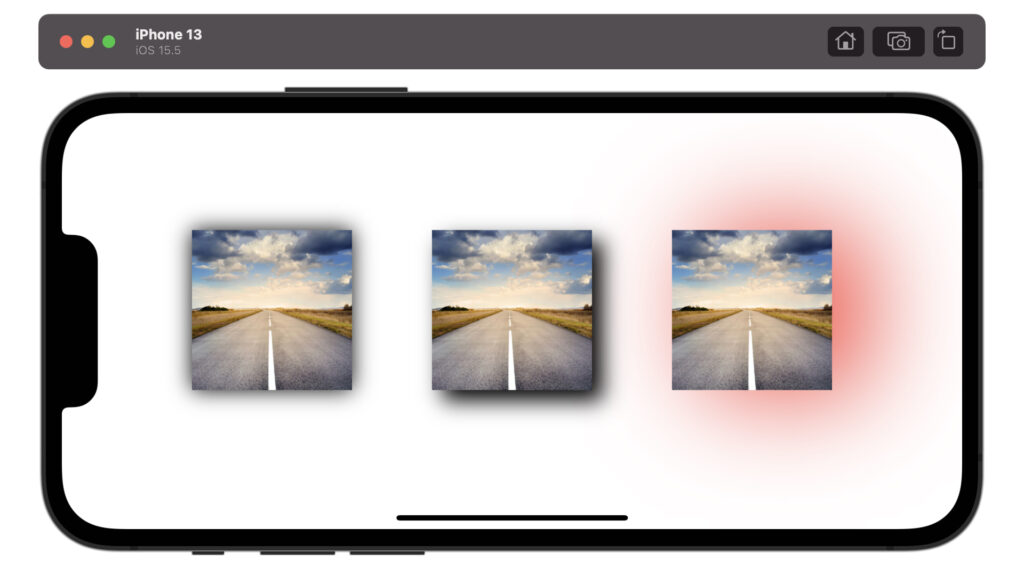
struct ContentView: View {
    var body: some View {
        HStack {
            Spacer()
            Image("SamplePicture")
                .resizable()
                .scaledToFit()
                .frame(width: 150, height: 150)
                .shadow(color: .black, radius: 10, x: 0, y: 0)
            Spacer()
            Image("SamplePicture")
                .resizable()
                .scaledToFit()
                .frame(width: 150, height: 150)
                .shadow(color: .black, radius: 10, x: 10, y: 10)
            Spacer()
            Image("SamplePicture")
                .resizable()
                .scaledToFit()
                .frame(width: 150, height: 150)
                .shadow(color: .red, radius: 50, x: 30, y: 0)
            Spacer()
        }
    }
}
回転の設定方法
平面の回転
.rotationEffect(.degrees(回転角), anchor: 回転軸)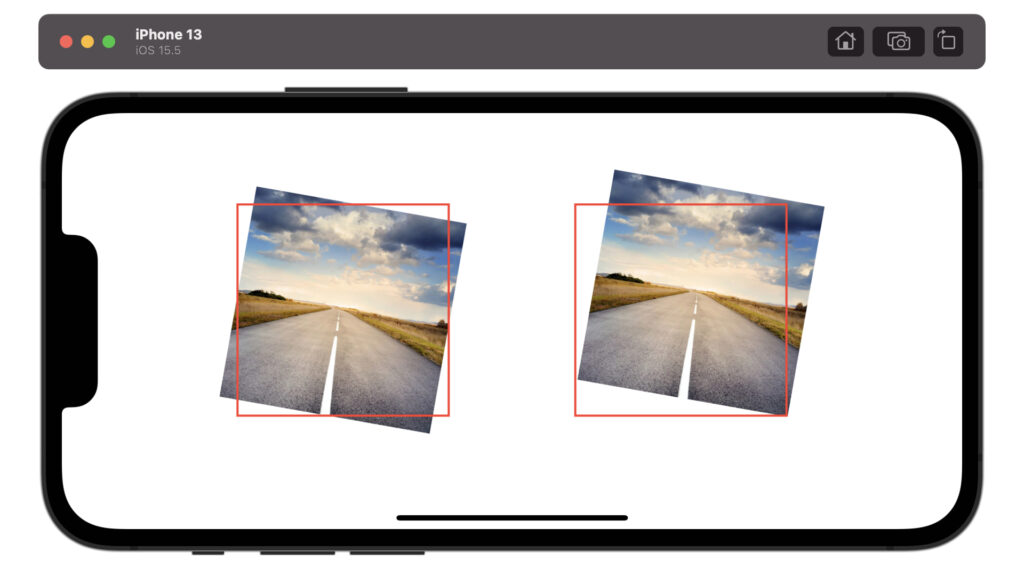
struct ContentView: View {
    var body: some View {
        HStack {
            Spacer()
            Image("SamplePicture")
                .resizable()
                .scaledToFit()
                .frame(width: 200, height: 200)
                .rotationEffect(.degrees(10), anchor: .center)
                .border(Color.red, width: 2)
            Spacer()
            Image("SamplePicture")
                .resizable()
                .scaledToFit()
                .frame(width: 200, height: 200)
                .rotationEffect(.degrees(10), anchor: .bottomTrailing)
                .border(Color.red, width: 2)
            Spacer()
        }
    }
}
立体の回転
xyzの3次元のどの軸で回転させるかを指定します。”1″だとその回転軸を使用し、”0″だとその回転軸は使用しません。
.rotation3DEffect(.degrees(回転角), axis: (x: 回転軸, y: 回転軸, z: 回転軸))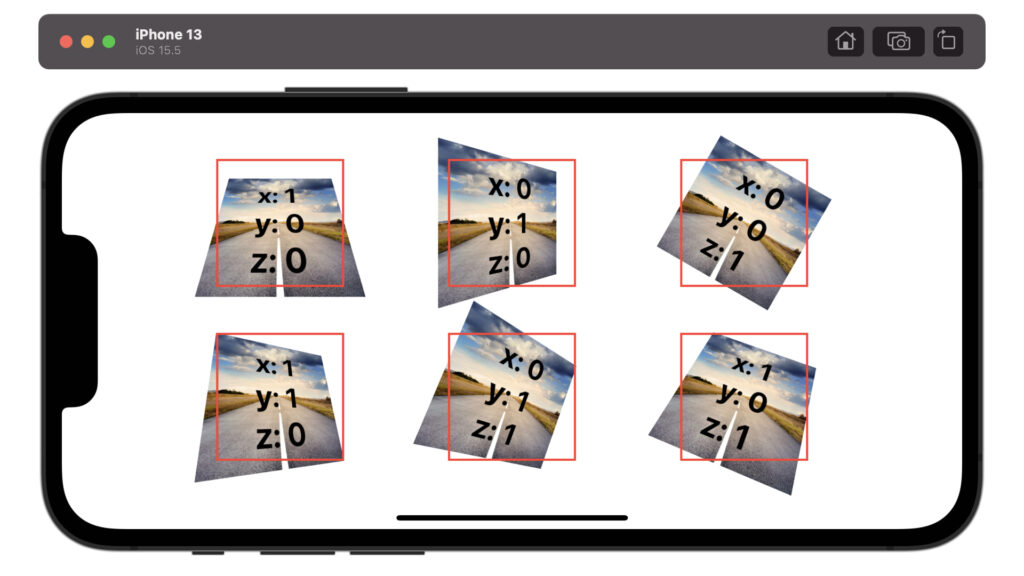
struct ContentView: View {
    var body: some View {
        VStack {
            Spacer()
            HStack {
                Spacer()
                Image("SamplePicture")
                    .resizable()
                    .scaledToFit()
                    .frame(width: 120, height: 120)
                    .overlay(
                        Text("x: 1\ny: 0\nz: 0")
                            .font(.title)
                            .fontWeight(.bold)
                            .foregroundColor(.black)
                    )
                    .rotation3DEffect(.degrees(30), axis: (x: 1, y: 0, z: 0))
                    .border(Color.red, width: 2)
                Spacer()
                Image("SamplePicture")
                    .resizable()
                    .scaledToFit()
                    .frame(width: 120, height: 120)
                    .overlay(
                        Text("x: 0\ny: 1\nz: 0")
                            .font(.title)
                            .fontWeight(.bold)
                            .foregroundColor(.black)
                    )
                    .rotation3DEffect(.degrees(30), axis: (x: 0, y: 1, z: 0))
                    .border(Color.red, width: 2)
                Spacer()
                Image("SamplePicture")
                    .resizable()
                    .scaledToFit()
                    .frame(width: 120, height: 120)
                    .overlay(
                        Text("x: 0\ny: 0\nz: 1")
                            .font(.title)
                            .fontWeight(.bold)
                            .foregroundColor(.black)
                    )
                    .rotation3DEffect(.degrees(30), axis: (x: 0, y: 0, z: 1))
                    .border(Color.red, width: 2)
                Spacer()
            }
            Spacer()
            HStack {
                Spacer()
                Image("SamplePicture")
                    .resizable()
                    .scaledToFit()
                    .frame(width: 120, height: 120)
                    .overlay(
                        Text("x: 1\ny: 1\nz: 0")
                            .font(.title)
                            .fontWeight(.bold)
                            .foregroundColor(.black)
                    )
                    .rotation3DEffect(.degrees(30), axis: (x: 1, y: 1, z: 0))
                    .border(Color.red, width: 2)
                Spacer()
                Image("SamplePicture")
                    .resizable()
                    .scaledToFit()
                    .frame(width: 120, height: 120)
                    .overlay(
                        Text("x: 0\ny: 1\nz: 1")
                            .font(.title)
                            .fontWeight(.bold)
                            .foregroundColor(.black)
                    )
                    .rotation3DEffect(.degrees(30), axis: (x: 0, y: 1, z: 1))
                    .border(Color.red, width: 2)
                Spacer()
                Image("SamplePicture")
                    .resizable()
                    .scaledToFit()
                    .frame(width: 120, height: 120)
                    .overlay(
                        Text("x: 1\ny: 0\nz: 1")
                            .font(.title)
                            .fontWeight(.bold)
                            .foregroundColor(.black)
                    )
                    .rotation3DEffect(.degrees(30), axis: (x: 1, y: 0, z: 1))
                    .border(Color.red, width: 2)
                Spacer()
            }
            Spacer()
        }
    }
}
以上です。ご参考になれば幸いです。

コメント欄