こんにちはコーヤです。
このページでは、SwiftUIで使用できる図形とその編集方法についてご紹介します。
以下のバージョンで動作確認しています。
- Xcode 13.4.1
- Swift 5.6.1
図形の種類
四角形
Rectangle()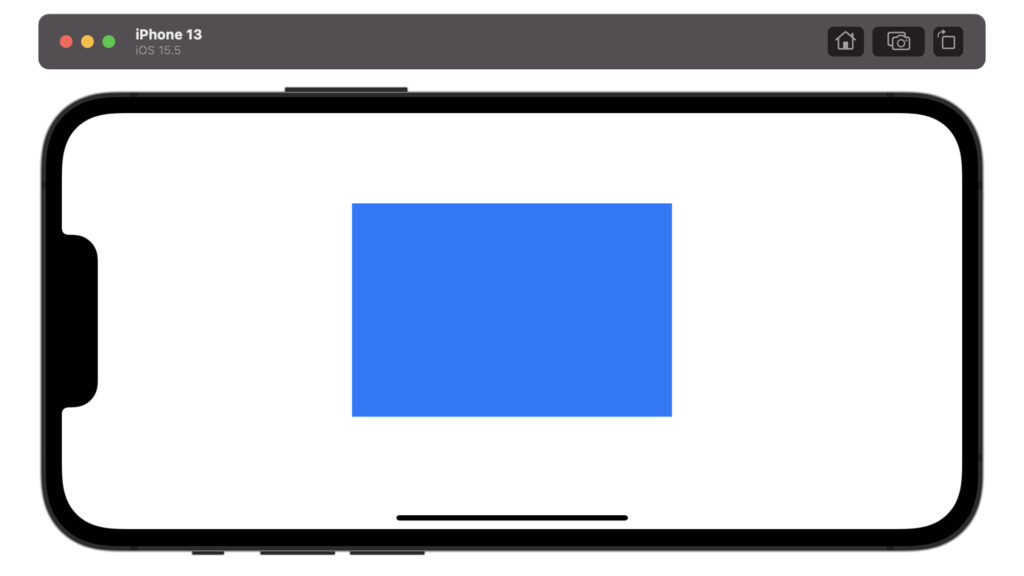
struct ContentView: View {
    var body: some View {
        Rectangle()
            .fill(.blue)
            .frame(width: 300, height: 200)
    }
}
四角形(角丸)
RoundedRectangle(cornerRadius: 角の半径)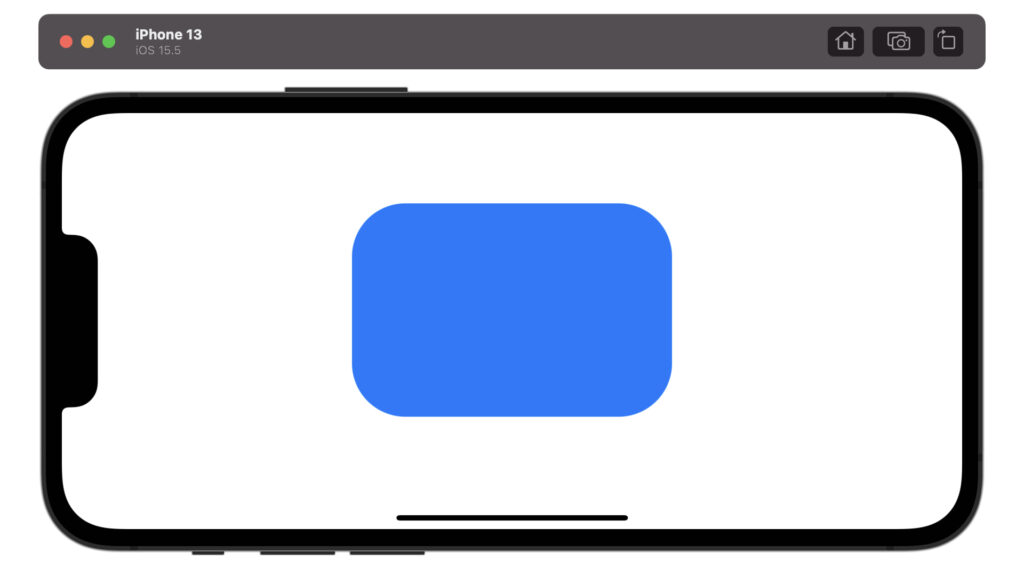
struct ContentView: View {
    var body: some View {
        RoundedRectangle(cornerRadius: 50)
            .fill(.blue)
            .frame(width: 300, height: 200)
    }
}
四角形(楕円形角丸)
RoundedRectangle(cornerSize: .init(width: 角の横方向の半径, height: 角の縦方向の半径))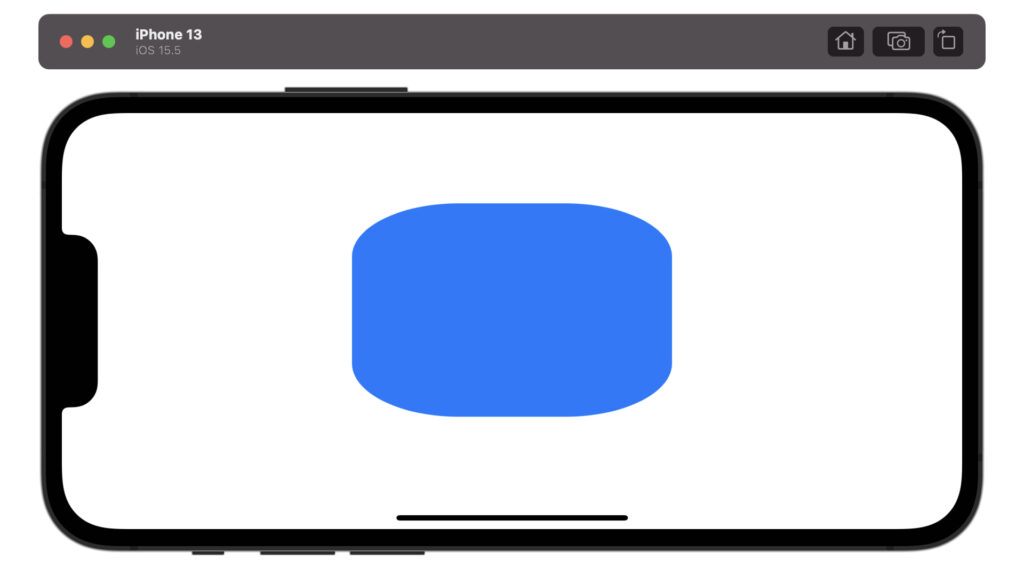
struct ContentView: View {
    var body: some View {
        RoundedRectangle(cornerSize: .init(width: 100, height: 50))
            .fill(.blue)
            .frame(width: 300, height: 200)
    }
}
円
Circle()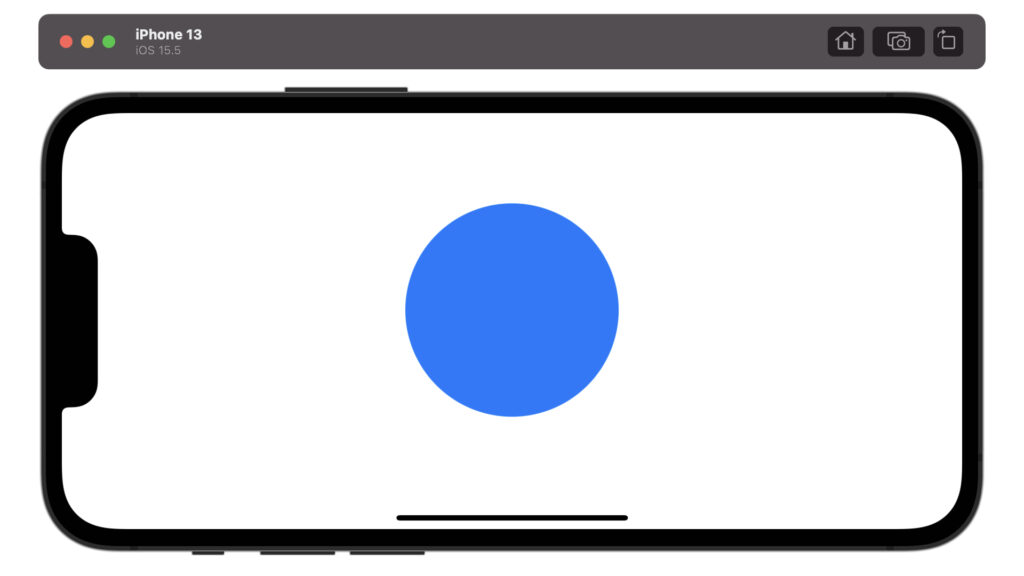
struct ContentView: View {
    var body: some View {
        Circle()
            .fill(.blue)
            .frame(width: 300, height: 200)
    }
}
楕円
Ellipse()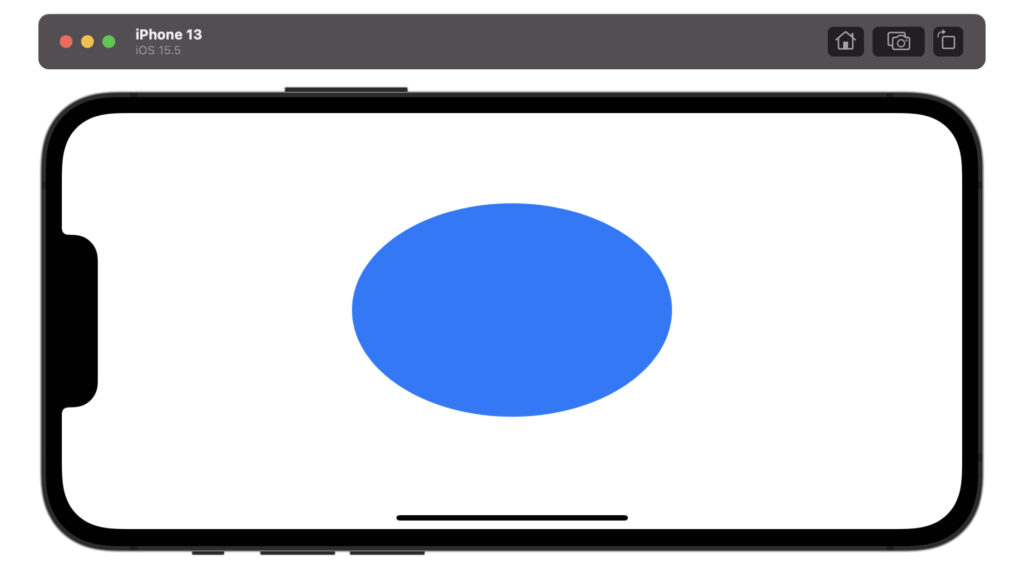
struct ContentView: View {
    var body: some View {
        Ellipse()
            .fill(.blue)
            .frame(width: 300, height: 200)
    }
}
カプセル
Capsule()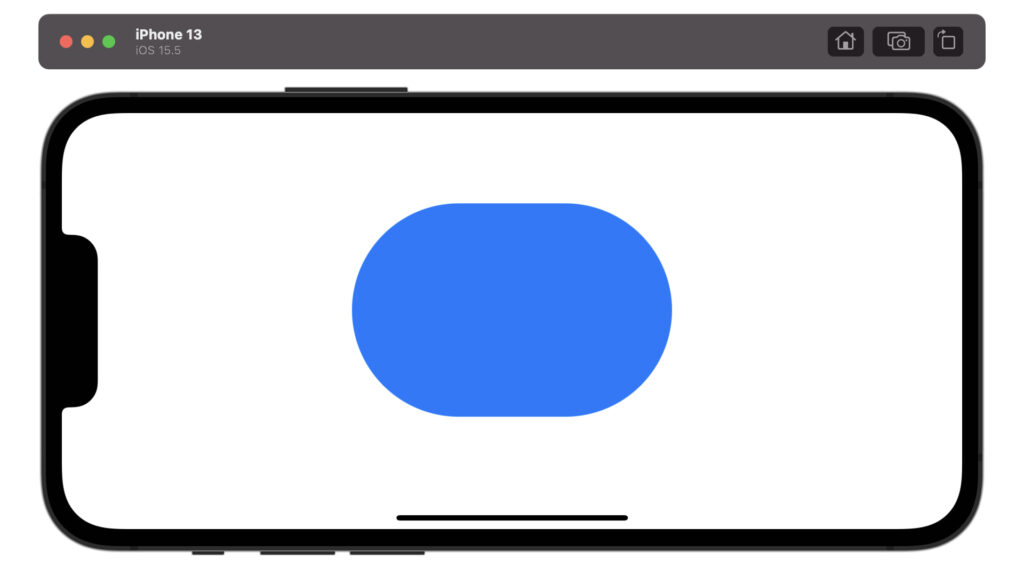
struct ContentView: View {
    var body: some View {
        Capsule()
            .fill(.blue)
            .frame(width: 300, height: 200)
    }
}
塗り色の設定方法
単色で塗る
.fill(塗り色).foregroundColor(塗り色)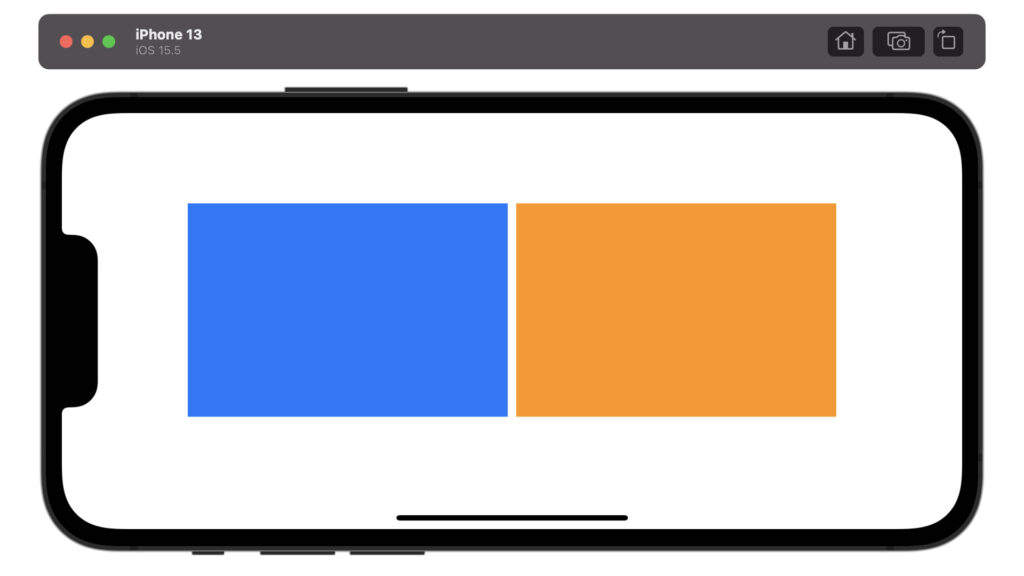
struct ContentView: View {
    var body: some View {
        HStack {
            Rectangle()
                .fill(.blue)
                .frame(width: 300, height: 200)
            Rectangle()
                .foregroundColor(.orange)
                .frame(width: 300, height: 200)
        }
    }
}
グラデーションで塗る
LinearGradient(gradient: Gradient(colors: [色1, 色2]), startPoint: 色1の位置, endPoint: 色2の位置)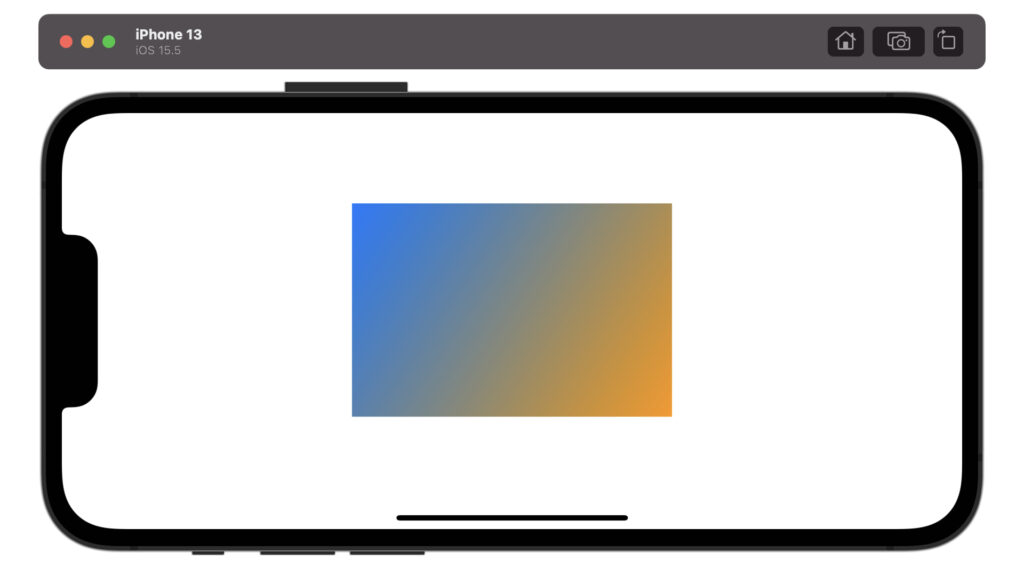
struct ContentView: View {
    let gradationColor = LinearGradient(gradient: Gradient(colors: [.blue, .orange]), startPoint: .topLeading, endPoint: .bottomTrailing)
    var body: some View {
        Rectangle()
            .fill(gradationColor)
            .frame(width: 300, height: 200)
    }
}
枠線の設定方法
枠線を表示する
.stroke(枠線の色, lineWidth: 枠線の太さ)
struct ContentView: View {
    var body: some View {
        Rectangle()
            .stroke(Color.blue, lineWidth: 5)
            .frame(width: 300, height: 200)
    }
}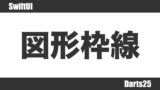
文字の設定方法
図形の上に文字を書く
.overlay(テキスト)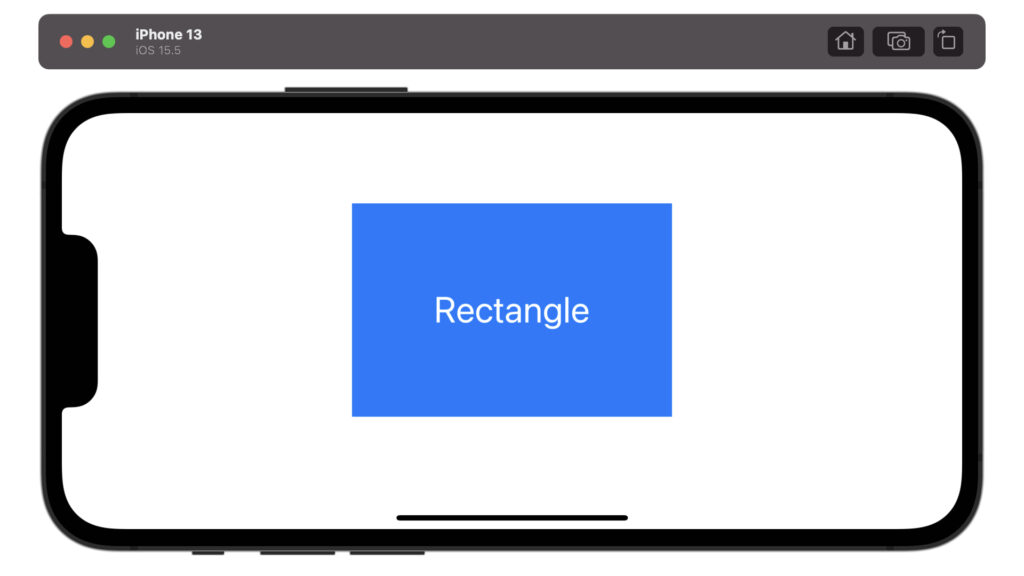
struct ContentView: View {
    var body: some View {
        Rectangle()
            .fill(.blue)
            .frame(width: 300, height: 200)
            .overlay(
                Text("Rectangle")
                    .font(.largeTitle)
                    .foregroundColor(.white)
            )
    }
}
回転の設定方法
回転させた図形全体を表示する
.rotationEffect(.degrees(回転角))
struct ContentView: View {
    var body: some View {
        Rectangle()
            .fill(.blue)
            .frame(width: 300, height: 200)
            .rotationEffect(.degrees(30))
    }
}
回転してはみ出た部分は削除して表示する
.rotationEffect(.degrees(回転角))
.clipped()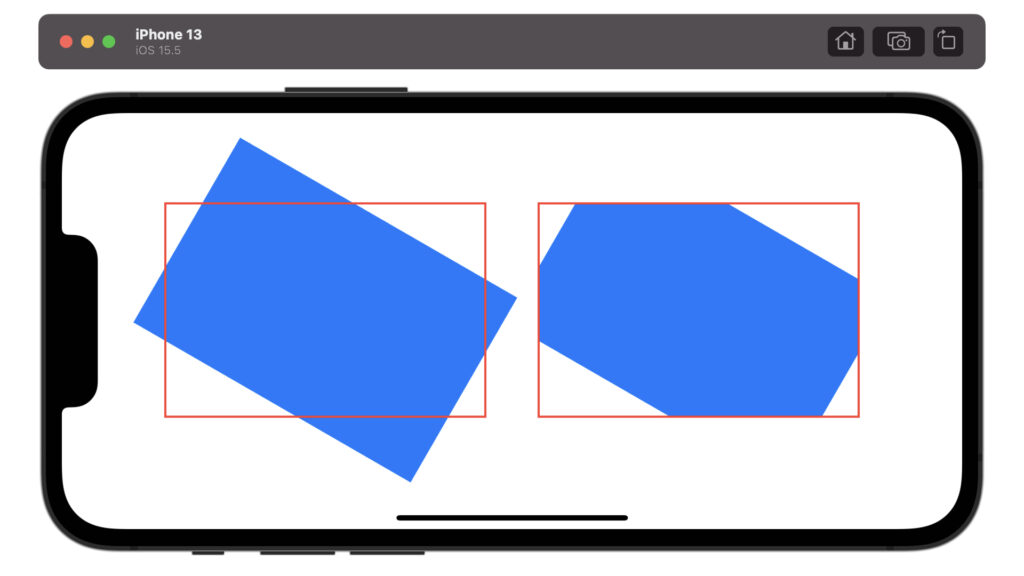
struct ContentView: View {
    var body: some View {
        HStack {
            Spacer()
            ZStack {
                Rectangle()
                    .fill(.blue)
                    .frame(width: 300, height: 200)
                    .rotationEffect(.degrees(30))
                Rectangle()
                    .stroke(Color.red, lineWidth: 2)
                    .frame(width: 300, height: 200)
            }
            Spacer()
            ZStack {
                Rectangle()
                    .fill(.blue)
                    .frame(width: 300, height: 200)
                    .rotationEffect(.degrees(30))
                    .clipped()
                Rectangle()
                    .stroke(Color.red, lineWidth: 2)
                    .frame(width: 300, height: 200)
            }
            Spacer()
        }
    }
}
回転軸を設定する
.rotationEffect(.degrees(回転角), anchor: 回転軸)
struct ContentView: View {
    var body: some View {
        HStack {
            Spacer()
            ZStack {
                Rectangle()
                    .fill(.blue)
                    .frame(width: 150, height: 150)
                    .rotationEffect(.degrees(30))
                Rectangle()
                    .stroke(Color.red, lineWidth: 2)
                    .frame(width: 150, height: 150)
            }
            Spacer()
            ZStack {
                Rectangle()
                    .fill(.blue)
                    .frame(width: 150, height: 150)
                    .rotationEffect(.degrees(30), anchor: .bottomLeading)
                Rectangle()
                    .stroke(Color.red, lineWidth: 2)
                    .frame(width: 150, height: 150)
            }
            Spacer()
            ZStack {
                Rectangle()
                    .fill(.blue)
                    .frame(width: 150, height: 150)
                    .rotationEffect(.degrees(30), anchor: .trailing)
                Rectangle()
                    .stroke(Color.red, lineWidth: 2)
                    .frame(width: 150, height: 150)
            }
            Spacer()
        }
    }
}
表示位置の設定方法
.position(x: 中心の座標, y: 中心の座標)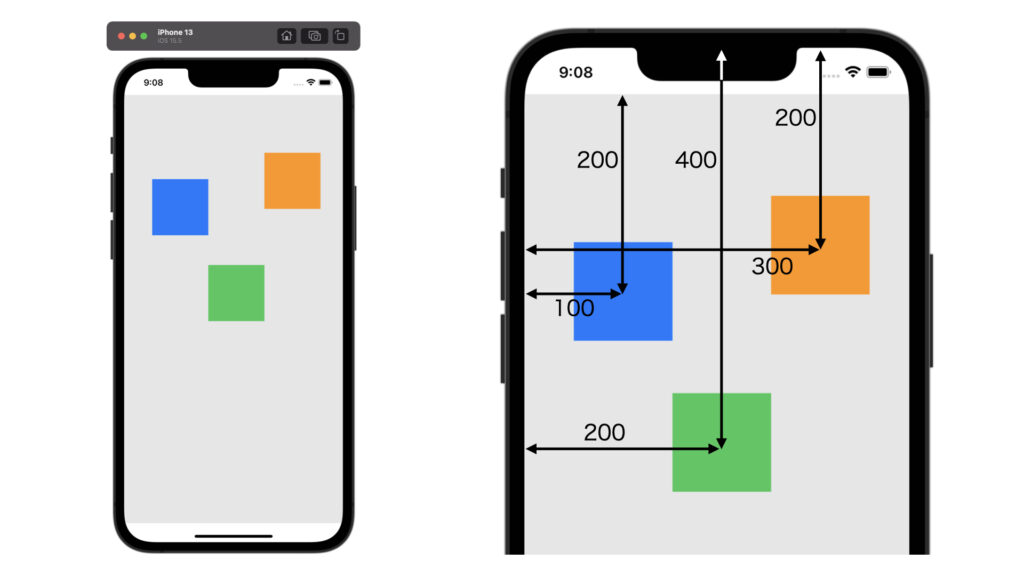
struct ContentView: View {
    var body: some View {
        ZStack {
            Color.background
            Rectangle()
                .fill(.blue)
                .frame(width: 100, height: 100)
                .position(x: 100, y: 200)
            Rectangle()
                .fill(.orange)
                .frame(width: 100, height: 100)
                .position(x: 300, y: 200)
                .edgesIgnoringSafeArea(.top)
            Rectangle()
                .fill(.green)
                .frame(width: 100, height: 100)
                .position(x: 200, y: 400)
                .edgesIgnoringSafeArea(.top)
        }
    }
}

extension Color {
    static var background: Color {
        return Color(red: 230/255, green: 230/255, blue: 230/255, opacity: 1.0)
    }
}
以上です。ご参考になれば幸いです。
コメント欄